Tomato Soup and Lentil “Bread” (gluten free)

So last fall I was eating some lentils, and the thought popped into my head, I wonder if you can make bread with lentils?  So of course, I did what every good internet user does: I Googled it.  This brought me to Nora’s blog, Natural Noshing, where she had coincidentally posted a recipe the previous day about using lentils to make a flatbread.  So I tried it and actually made it numerous times throughout the semester.  I hadn’t made it in a while, but then my mom reminded me about it and I decided to try it again a few times.  The other night tomato soup sounded good, so I made the bread to go with it.

Nora’s recipe is obviously my inspiration for this adaption (even more coincidentally, she posted another lentil bread recipe today!), but here is my take on it.

Lentil Bread  (gluten free)

1 cup cup green lentils
2 Tbsp flaxseed meal
1 cup water
1 egg
3 TB olive oil
1/2 TB paprika
2 TB dried minced onions
1/2 TB garlic powder
1/2 TB basil
2 tsp sea salt
1 tsp baking soda

Preheat oven to 375F. In a small food processor, grind up the lentils until they are like a coarse flour. I used a Vitamix with the dry foods blade/container. Pour into a bowl (or keep in the blender), and mix in the water, then the egg, oil, and spices. It should be a relatively thick mixture, although thinner at first; the lentils will absorb the liquids. Grease a 9×9 pan with your oil of choice, pour into the pan and smooth out the mixture, sprinkle spices on the top to garnish (optional). Bake for 24-30 minutes, or until the top is crispy and browned. Let cool and enjoy!

This recipe for tomato soup is from Eileen Gotschall’s book, Breaking the Vicious Cycle, which details the specific carbohydrate diet.  This is recommended for those who live with Crohn’s Disease, Diverticulitis, Celiac Disease, autism, Candida overgrowth and Cystic Fibrosis.  I’d recommend looking into it even if you’re just looking for ways to eat healthier, it’s very informative.

Cream of Tomato Soup

2 cups tomato sauce
1/2-1 cup homemade yogurt
honey to taste
1-2 tsp salt
1 TB basil

Blend together the tomato sauce, yogurt and honey (I used a Vitamix); then add the salt and basil. Pour into a pot and cook on medium high until hot and steaming. Serve into bowls and enjoy.

I hope you find these recipes helpful – let me know if they try them and how they turn out! :)

carrot cake muffins

Hello readers!  I have another recipe for you: carrot cake muffins!  To me, this seems very “spring-y”; you don’t eat these in December, that’s for sure.  The weather here in Chicago has been incredibly warm, I’m talking like 80+ degrees.  Apparently this is a record-breaking high, and I don’t doubt it.  But I’m not complaining, it’s amazing!  So my mom made these muffins the other day, and I’m not going to pretend like I did, but they are delicious.  Also, the recipe isn’t my own either.  If you are looking for healthy, grain-free recipes I would recommend checking out Elana’s Pantry.  She predominately uses almond flour, which is a spectacular grain replacement in most cases, as it takes on a very grain-like texture when baked.  I’ve found that it works especially well with coconut flour, however, this recipe relies solely on almond flour.  Also, I did make a cream cheese frosting to top these off, but it was too dark by that point to take a picture.  You’ll just have to trust me that they were delicious!

As I said, this recipe is not my own and is originally found here, as an actual carrot cake.  Elana also has a cupcake version here, but when we made these we used the cake recipe and just made a lot of muffins.  You could alternately half it to make less.

3 cups blanched almond flour
2 teaspoons celtic sea salt (I find this too salty and just use 1 tsp)
1 teaspoon baking soda
1 tablespoon cinnamon
1 teaspoon nutmeg
5 eggs
½ cup agave nectar (or honey to taste)
¼ cup grapeseed oil (or melted coconut oil)
3 cups carrots, grated
1 cup raisins
1 cup walnuts (optional)

  1. In a separate bowl, mix together eggs, agave and oil
  2. Stir carrots, raisins and walnuts into wet ingredients
  3. Stir wet ingredients into dry
  4. Place batter into 2 well greased, round 9-Inch cake pans
  5. Bake at 325° for 35 minutes
  6. Cool to room temperature and spread with Elana’s cream cheese frosting or coconut cream frosting for vegan option
  7. Serve

I hope you try these out and enjoy them as much as I did!  Almond flour is a great way to eat grain-free but never sacrifice on delicious taste. :)  Have you ever baked or cooked with nut flours before?

gluten free oatmeal raisin cookies

Hello readers!  Well, it has unfortunately been a bit longer than I would have liked it to be in between posts.  I was working on this recipe on Monday, but my camera battery charger decided to disappear; after I took a few pictures, it died.  However, yesterday I broke down and got an iphone (Being an android convert, I am realizing Apple keeps a little tighter grip on its products.  This isn’t good or bad, I think.), so I decided to take advantage of the new technology I have access to and go a little instagram crazy instead.  :)  Hopefully, I will find my charger soon and be back to my “real” pictures.  But for now, this will have to do!

I made oatmeal raisin cookies a few weeks ago with almond flour, but this time I decided to try something different.  Plus, I didn’t feel like grinding up some almonds and just fished around for some pre-ground flour instead.  So I found a bag of amaranth flour…did you know that amaranth (along with quinoa) is considered a “complete protein“?  This means that it has all 9 of the essential amino acids that your body needs to function properly.  Most grains need to be combined with other sources of nutrients to achieve the status of complete protein, such as eating beans with rice or peanut butter with wheat bread.  I didn’t know this until I googled around a bit before starting this recipe…good to know!

1 1/4 cup Amaranth flour
2 cups gluten free rolled oats
3/4 cup butter (or coconut oil, softened but not melted)
2 eggs
3/4 cup honey
1 T vanilla extract
1/2 tsp. baking soda
1/2 tsp. sea salt
1 T cinnamon
1/2 tsp allspice
1/2 ground cloves
1 1/2 cups raisins

Preheat oven to 375.  In a medium mixing bowl, blend together the butter, eggs, vanilla,  and honey until well combined.  Add in the Amaranth flour, baking soda and salt.  The mixture should still be a little wet, so then add in the spices and oats, and finally the raisins.  Spoon out rounded tablespoons onto a cookie sheet, and flatten a bit with the back of the spoon (they won’t flatten while baking).  Bake for 12-14 minutes.  Cool and enjoy!  Makes about 36 cookies.

What is your favorite kind of cookie?  Mine is peanut butter, and a “peppermint snowball” Christmas cookie as a close second (although not together of course!).

thank you!

Wow, I am completely shocked at the amount of traffic and viewers who have found this blog in the past 12 hours, mainly due to the lasagna recipe!  This is also predominately because the accompanying picture was accepted on Foodgawker this afternoon, which I am also pretty surprised about!  So all in all, hello to the viewers from Foodgawker, thank you for the views, and thank you to those of you who have been re-pinning the picture on Pinterest as well!  By the way, you can now follow me there too.  More pictures will be added as I take them!

Tonight I am excited to share another recipe with you, but this time of the sweeter variety.  This is one of my favorites, because not only is it incredibly delicious, it is also extremely easy – only 5 ingredients!  Its surprising how light and cake-like it is.  This was my birthday cake last year and I served it with strawberries on top…sooooooo good, even my friends who had no idea what it was made of enjoyed it.

Flourless Chocolate Cake

1 cup nut butter – the kind with only nuts & salt as the ingredients (I used peanut, but feel free to use whichever one is your favorite)
1 egg (not sure how it would work if you used egg substitutes if you don’t eat eggs, but I would encourage you to try it and see)
1/2 – 1 cup honey (depending on your preferred level of sweetness; I prefer things on the “richer” side.  Also, you can change up the sweeter if you’d like, ie: stevia/agave nectar for vegan, etc.)
1 tsp baking soda
3/4 cup cocoa powder (also varied depending on how you like desserts, I tend to like a lot of chocolate!)

Preheat oven to 350.

In a medium bowl, mix nut butter with honey and egg, stirring well until blended together.  I just used a spoon, but a mixer or blender would work even better.  Add in the baking soda and cocoa powder, and making sure all the cocoa is mixed well.  Pour into a 9″ round cake pan, bake for 15-20 minutes, or until solid on top and slightly browned.  Let cool for about 30 minutes, then devour immediately eat a piece and save the rest for later, if you can! :)

Makes one 9 inch cake.

What’s your favorite type of dessert?  I love chocolate, including as dark as it gets – 100% cocoa!  Almost everyone I know thinks its gross (especially my boyfriend) but I love it!

grain free lasagna

While I will be the first to admit that this blog is most likely going to feature food selections of the sweeter variety (if the past is any indication), I thought that it wouldn’t be a bad idea to feature some alternative meals as well.  This is a popular one that I intend to revisit soon, but I will post the recipe now, as best as I recall it.  Thankfully, it isn’t something that’s easy to mess up, so I guarantee it will taste good either way!

My roommate at the time gave me the idea for this, because she mentioned something about eggplant permesan.  I was craving lasagna at the time and decided to put the two together.  This recipe is for “regular” lasagna, but it could very easily be made as vegetarian or any other variety depending on what you add to it.

1 lb. ground beef
1 TB garlic powder
1 small onion, minced
25 oz. spaghetti sauce (I made my own but you can easily use a pre-made variety.)

1 large eggplant
15 oz. ricotta cheese
1/2 cup parmesan cheese
1 1/2 cups mozzarella cheese
basil to garnish
Any other vegetables, such as spinach, mushrooms, etc.

Preheat oven to 375.

Start by caramelizing the onions in a medium skillet on medium high heat, adding the beef and garlic shortly afterwards.  When fully cooked, drain the fat, then add the spaghetti sauce.  Simmer on low heat for about 10 more minutes.

Bring a large pot of water to boil.  Peel the eggplant (I just used a knife, but you could use a vegetable peeler).  Then, cut in thin slices about 3 inches in width and 1/8″ or less thick, depending on the size of the eggplant.  These are the “noodles”; add them to the boiling water for about 5-7 minutes, until they are softer and more easily cut (might want to test it out).

Spread some spaghetti sauce in the bottom of a 9×13″ pan, to prevent the eggplant from sticking to the bottom.  Arrange the “noodles” in one layer covering the bottom of the pan.  Add a nice layer of ricotta cheese, followed by another layer of eggplant.  Top this with a layer of the meat/sauce mix, and continue until all of the ingredients are used up (it could and will be a bit uneven, but that’s ok).  Here’s where you can add in any other vegetables you may want to use, layering them in with the rest.  Finish the layers with the parmesan and mozzerella cheeses, and garnish with basil to taste.  Bake for about 30-45 minutes, until bubbling.  I turned on the broiler for another couple minutes to add a crispy top, but that’s optional.

Makes one 9×13 inch pan of lasagna.

Enjoy!  Let me know if you change it up or add in anything else, it is really is very customizable and the eggplant is only recognizable upon close examination, trust me.

What other “unusual” uses have you found for vegetables?  I love hiding them in recipes where no one expects them to be!

Edit: I have heard that the lasagna has the potential to turn out a bit watery…this wasn’t the case when I made it but I have a feeling it could be from the eggplant.  After cooking it, try putting it in the warming oven for 5 minutes to dry it out, or roast it instead of boiling it.  If either of these works for you, let me know so that I can let the rest of you know!  Thanks. :)

chocolate coconut truffles!

I’ve been making these a lot lately…well, “a lot” as in today I made the the 4th batch in about two weeks.  So would you classify that as an addiction?  Not sure. :)  But anyway, they are loosely based off of Katie’s Fudge Babies recipe(s), with a few personalized add-ins and subtractions.  So I can’t quite take complete credit for this recipe (who can with anything, to be honest?), but that doesn’t mean I love it any less!

Chocolate Coconut Truffles

(Disclaimer: The measurements given here are definitely not exact – I usually don’t measure for this recipe and just go by what looks good.  Feel perfectly free to change the ratios (or the ingredients, for that matter) if it’s not working out so well for you.)

4 or 5 Dates (soaked in a small amount of hot water for about 15 minutes)
1/2 cup cashews
1/4 cup cocoa powder (gluten free, if needed)
3 TB Coconut oil, melted (optional, could use another oil/liquid if necessary)
1 tsp vanilla
1/4 cup unsweeted shredded coconut + about 1/8 cup
Optional: more sweetener – I don’t have much of a sweet tooth so I like things a little “richer”, but if you find that it’s not sweet enough for you, you can add more dates or another type of sweetener, such as honey, stevia, coconut palm sugar, pure maple syrup or regular granulated sugar, if you’re into that. :)

Basically, blend everything up together!

1. More specifically, I blend the cashews with the cocoa powder first, in a Magic Bullet (or Vitamix/food processor would would great) until they almost start to turn into chocolate-y cashew butter goodness, usually about a minute or so.  Set aside in a small-ish bowl.

2. Next, de-pit the dates and blend them with about 4 TB of the water used for soaking, the melted coconut oil, and the vanilla.

3. Pour this into the bowl with the dry mixture, and stir together, adding the shredded coconut until the mixture becomes less sticky.  If it’s still too wet, add more coconut or place it in the freezer for about 20 minutes until it becomes harder.

4. Roll into balls, and then into more of the shredded coconut (about 1/8 cup or so).

A note about the shredded coconut: mine is in pretty small pieces, less shredded and more…ground up?  I got it from Tropical Traditions and I love it!

5. Enjoy!  I keep mine in the freezer because I like the way they melt slightly when de-thawing, but they would be great in the refrigerator or eaten right away.

Yield: about 10.

dorm yogurt

So I am currently a senior attending a university in Southern California (though I am from Chicago), and much to my dismay, when I’m not at home I still live in the dorms.  This is torture for me, because I would much rather cook all of my own meals and have a cute little kitchen to myself…couldn’t be farther from the truth.  But yesterday I was determined to make yogurt.  My mom makes this at home and I do too, so I knew what I was doing, but I lacked a candy thermometer and a way to keep the cultures at 110 degrees for 12 hours.  But I thought about it for something like 3 weeks until I came up with a solution: my roommate’s regular “fever” thermometer and a large-ish tupperware container I keep my dishes in + a towel + hot water from our coffeemaker.  24 hours later = yogurt!  Amazingly, it worked.  This was especially shocking because I accidentally over boiled the milk (GAH what a mess, and it’s definitely not supposed to reach 212 degrees) and scalded the bottom of the pot.  I was busy boiling the mason jars and forgot how fast a 1/2 gallon of milk heats up, when I am used to cooking 2 gallons at home.  Anyway, I am very excited because it worked and I now have 2 quarts of delicious probiotic-laden yogurt.  At this rate, I think I’ll have to make more next weekend!

Here is roughly what I did.  I found a “recipe” where the person making it did not mention specific temperatures (I liked this because of my lack of thermometer) and then made it how I was taught. This might seem complicated at first, but once you do it you’ll see its really quite simple.

You’ll need organic milk and organic yogurt with active cultures to start – I used Fage Greek yogurt, because I wanted strong cultures, but you can use any plain yogurt, really.

1. Heat the milk until almost boiling point. Watch out! As you know the milk will boil over. So at the point of boiling, when you see the milk start rising and eager to mess up your stove, TURN THE HEAT OFF!  (Where I messed up…) Officially, the temperature should be 185 degrees.

2. Let it cool down but you want to work with it warm. So stick your finger in and if you can tolerate it for 10 seconds while still feeling the warmth, you’re good to go.  AKA: 110 degrees.

3. Mix in about 1/4 cup of yogurt cultures (the Greek one I mentioned).

4. Pour into mason jars, cover, and keep at 110 degrees for 6-24 hours.  The longer you let it sit the less casein and milk sugar remains; at home we keep it in a dehydrator set at 110 for 24 hours.  But I believe it is considered yogurt after about 6 hours, if you really want to cut it short.  For me, I kept it at 110 for 12 hours (like I mentioned above), setting the jars in a covered container of water and wrapping it with a beach towel.  I checked it every 1 1/2 hours or so, adding hot water as needed.  It wasn’t TOO big of a hassle, but it definitely made the hours of the day go by strangely fast…

5. After your desired amount of time as passed, place it in the refrigerator until chilled.

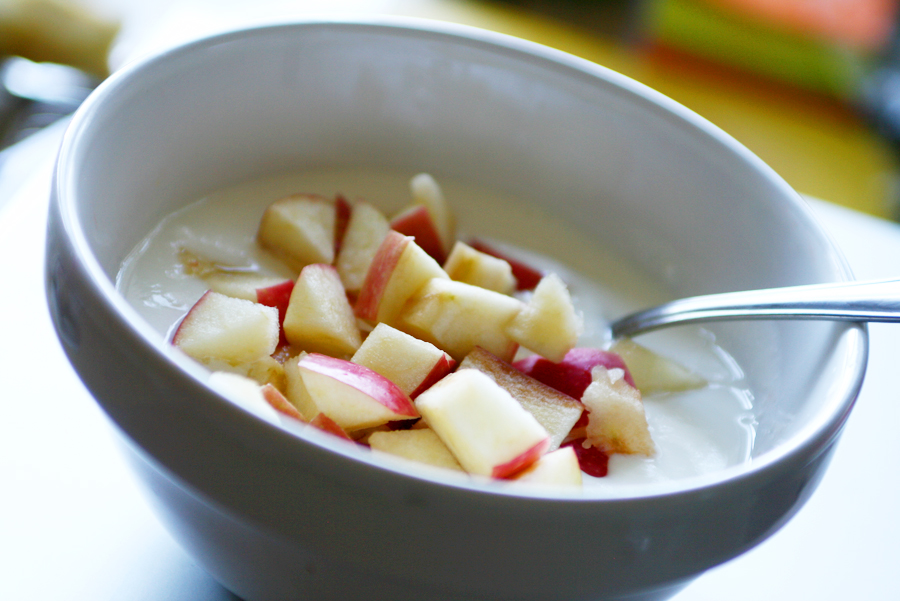
6. Enjoy!  I like to add just cut up apples, but any other fruit/granola (if you tolerate grains) would taste great, I’m sure.  Or even some vanilla, or some exotic things…the choices are endless.

(I am by no means a yogurt expert, but this is what has worked for me.  There are many other little variations out there, some more complex/simple than others.  Experiment and figure out what you like!)

chocolate chips (vegan, gluten free, refined sugar free)

If you’re on a refined sugar-free diet like us (meaning no fake sugars either) it’s a little difficult to find chocolate chips.  Even simply gluten free eaters have a little harder time finding them too, because most brands use wheat.  And if you do happen to find some, they are going to cost you, say, an arm and a leg, at the very least.  This was a problem, because I was really, really craving chocolate chip cookies.  Sure, I made chocolate cookies and chocolate peanut butter cookies, but those are just not the same.  When you want chocolate chips, you want chocolate chips.  So of course I had to make some!  (Unfortunately, I was not able to get a picture of the fabled chocolate chip cookies, because my camera battery was dead and I didn’t have my charger.  I used Elana’s recipe.)

Luckily, the first combination of ingredients I tried worked…and that’s not usually the case.  It was just meant to be. :)  These are deliciously semi-sweet, with just the right amount of sweet to balance the cocoa.  They hold together when baked, but melt just enough to turn chocolately.

3 TB coconut oil (2 melted, 1 mostly melted)
2 TB gluten-free cocoa powder + 3 TB (or cinnamon for cinnamon chips!)
1 tsp vanilla
2 TB honey (or agave nectar to be vegan – if using agave, add 2 additional teaspoons tapioca starch)
1 TB tapioca starch

1. Add all ingredients to high-power blender (I use a VitaMix, with the dry container so that the ingredients don’t get sucked into the bottom), but just the first 2 TB of cocoa powder.

2. Mix on medium for about 20 seconds, then increase to high for about 10 seconds.  Since there isn’t much in the blender, it will look like it’s not really mixing, but just keep it going.

3. Add the remaining 3 TB of cocoa powder, and blend on high for about 20 seconds.  The mixture should be tacky and sticky, and almost like caramel (but a little less so if using agave nectar).  Because the blender heats up the coconut oil, it will be melting a little in the bottom of the blender.  That’s normal, and it begins to separate from the mixture.

Now comes the part where you get creative…there are a few options here.  The first time I made these, I just pulled apart the mixture bit by bit and made “chips”.  That worked, but it took forever.  The next time I rolled it out in between two sheets of wax paper, which worked better.

Transfer to a cookie sheet, and freeze for about 30 minutes (or, you know, just put it outside if its anything like it is by me in Chicago).  After that, it will be a little more set, and cut into small squares/bits with a knife.  That method seemed to work best for me, but feel free to try anything else that you think might work.  Store in freezer.  They will never get completely as hard as a rock like “normal” chocolate chips (at least not with the honey), but I actually prefer that, personally.

Note: As much as a really dislike using starches, I think it is quite necessary in this recipe, in order to hold them together, and prevent melting everywhere – trust me, it’s not a pretty sight.  I think it’s a pretty good trade off, considering what’s in (or not in!) commercial chips.  I find its best to just forget about that little aspect when savoring any number of delicious treats, which can only be made complete with chocolate chips.  Let’s face it, its the truth!


(Hot chocolate whipped yogurt, topped with cocoa and chocolate chips, with a chocolate chip peanut butter brownie.)

Also, this recipe fits the guidelines for the SOS Kitchen Challenge…check it out!

tuesday

So today is Tuesday, and I have been cooking wheat free, gluten free, dairy free, yeast free, sugar free and (mainly) egg free meals for my family for about two weeks. At first, this was nearly impossible and I was tempted to just gnaw on a hunk of vegetables for each meal. But that wouldn’t do…I wanted real food. I wanted real meals. And I wanted them to taste GOOD. These restrictions really seemed to limit that, however. Thankfully, I have been used to eating “weird” food for most of my life, seeing as my brothers used to be allergic to gluten and dairy, so my mom would cook different things than most moms. They managed to rid themselves of those allergies a couple years down the road (or did they…) so lately my mom has been into general health food (keifers, soaking flours, alternative foods, etc.). However, the past month, my mom has become convinced that we are all suffering from an overgrowth of the yeast Candida, which is normally found in all humans, but exorbitant amounts of it can cause problems like allergies, brain fog, nausea, bloating, tiredness, psoriasis, and pretty much every other ailment under the sun. So, in an effort to cleanse ourselves of this, we are now following a very strict and rigid diet, which bans pretty much every food item found in common “normal” dishes. This is where the art of the challenge comes in: I am given the duty of creating dishes that please everyone (including unrealisticly high standards of my 19 year old brother) and still do what food was always and originally intended to do: nourish our bodies.

I decided to start this blog mainly to remember what I made each day (or at least the interesting things) and maybe help other people out in the process. Although – I am greatly at the mercy of the many many other blogs and research I found out here, I am merely a receiver of their tireless recipe-making efforts! So, I really claim no recipe as my own, although I do generally make many alternations.

So, today I made Strawberry Coconut Muffins – this is a HUGE landmark because my past three batches of muffins (one of which was this recipe, but with all applesauce instead of eggs – crazy, I know) failed in some aspect or another. Finally – what I had in my head actually materialized on the plate! Amazing. I only used 2 real eggs, because I didn’t feel like using up 6, and used 3 flax “eggs” (1 TB ground flax seeds to 3 TB water, per “egg”), and one cup of mashed left over spaghetti squash. And I also eliminated the sugar and added more coconut oil and some water. They were delicious!


And for dinner, I made Chicken Alfredo with homemade buckwheat noodles. I made a few alterations because we only had half a zucchini, so I put broccoli in with the noodles, and used the stalks from the broccoli in the sauce. It was soooo good…my parents had no idea! And thankfully I was pretty good with the cashews – I’ve been having some problems with them sometimes (brain fog and some tiredness). So all in all, a good day! I also made brown rice waffles for breakfast, but I didn’t get a picture of them. Maybe tomorrow, since there were leftovers. :)